
You can usually replace a simple knob lock, lever lock, or single-cylinder deadbolt yourself if the new lock matches the old measurements. The part that matters most is not the screwdriver work; it is identifying the lock type, measuring before you buy, and testing the latch before you close the door. If the door has a mortice lock, multipoint mechanism, serious frame damage, or rental restrictions, it is safer to pause before removing anything.
What type of door lock do you have?
Start by looking at the face of the door, the edge of the door, and how the key operates. A standard interior-style handle set is a very different job from a full multipoint lock on a uPVC or composite door. If you are changing a lock after moving into a new home or after losing a key, you may only need to change the cylinder rather than the full hardware.
- Key in the knob or lever: usually a standard lockset.
- Separate bolt above the handle: usually a single-cylinder deadbolt.
- Euro-shaped cylinder through a handle plate: common on uPVC, composite, and some modern timber doors.
- Deep lock case inside a timber door: likely a mortice lock.
- Long locking strip on the door edge: usually a multipoint system.
Knob and lever locksets
Knob and lever locksets are usually the easiest DIY replacement. They are often held by two interior screws, and once those are removed, the two handle halves separate and the latch slides out from the door edge. Still check the backset and door thickness before buying, because a near-match can leave the handle sitting crooked or the latch falling short of the strike plate.
Single-cylinder deadbolts
A single-cylinder deadbolt has a key on the outside and a thumb turn on the inside. If the replacement matches the existing bore, backset, and door thickness range, the job is normally straightforward: remove the inside screws, separate the two sides, swap the bolt body, and test the throw before closing the door.
Euro cylinder locks
With many euro cylinder locks, you can change only the cylinder instead of the full handle or locking strip. Measure from the center of the fixing screw to each end of the cylinder, because the two sides may not be equal.
The cylinder should sit neatly in the handle or escutcheon. If it sticks out too far, it may be more vulnerable; if it is too short, the key can be awkward to use.
Mortice locks
Mortice locks sit inside a pocket cut into a timber door, so replacement is less forgiving. Match the case depth, backset, forend size, and the position of the spindle or keyhole. On an older front door, a slightly wrong lock can mean visible gaps, extra chiseling, or a bolt that no longer lines up with the frame.
Multipoint locks
Multipoint locks secure the door at several points along the frame. If the key is the only problem, changing the euro cylinder may be enough. Replacing the full mechanism is more difficult because the gearbox, strip length, fixing positions, hooks, rollers, and keeps need to match closely.
Nightlatches
Nightlatches sit on the inside face of the door, with a rim cylinder passing through from the outside. Replacing the cylinder is often manageable; replacing the whole case needs a closer match for the latch position, case size, and fixing holes, especially on older painted doors where old marks will show.
What tools do you need to replace a door lock?
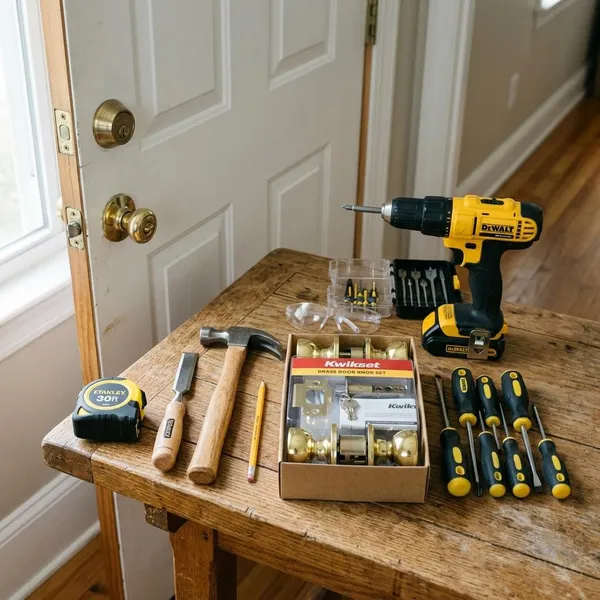
For a standard lockset or deadbolt, the basic tools are simple. The most useful preparation is laying the new parts beside the old lock before removal, so you can spot a different latch length, faceplate shape, or screw position early.
A Phillips screwdriver
A Phillips screwdriver handles most mounting screws on knobs, levers, deadbolts, and latch plates. A hand screwdriver gives better control than a drill, especially when removing old screws or tightening the new lock without making the mechanism bind.
A tape measure
Use a tape measure before you shop, not after the old lock is already out. For standard locks, check the backset and door thickness. For euro cylinders, measure both sides from the fixing screw. For mortice locks, note the case depth, backset, and faceplate size.
A flathead screwdriver
A flathead screwdriver is useful for lifting trim covers, loosening painted-in plates, or easing old hardware away from the door. Work gently; forcing the blade under trim can dent paint or tear wood fibers.
A pencil
A pencil helps mark screw holes, strike plate positions, and the outline of a plate before chiseling. It is especially useful when the new strike plate does not sit exactly where the old one did.
A drill for necessary adjustments
A drill is helpful for pilot holes and minor screw-position changes. Do not use it to force a badly matched lock into place. If holes are far off or the hardware sits under tension, recheck the measurements first.
A chisel for strike plate fitting
A chisel lets you trim a latch or strike plate recess so the plate sits flush. Take off small amounts and test often. A proud plate can make the latch scrape, while an over-cut recess can leave the hardware loose.
How do you replace a standard door lock?
For a standard knob or lever lockset, work with the door open, remove the inside screws, separate the handles, replace the latch, fit the new handles, tighten evenly, and adjust the strike plate if needed. Do not close the door until the handle and latch work smoothly while the door is open.
Keep the door open
Keep the door open from start to finish so you cannot accidentally lock yourself out with half-installed hardware. If the door swings, wedge it with a folded cloth or doorstop. This matters most on exterior doors, where a closed door with a partly fitted latch can become a real problem.
Remove the interior screws
Remove the screws on the inside face of the lock. If they are hidden under a decorative plate, lift the cover gently with a flathead screwdriver. Keep the old screws separate, but plan to use the screws supplied with the new lock unless the instructions say otherwise.
Pull off both handles
Pull the inside and outside handles away from the door without yanking. If paint or age has stuck them in place, wiggle them loose. Notice how the spindle or connecting bar passes through the latch, because the new set needs to engage the same way.
Remove the old latch
Unscrew the latch faceplate on the door edge and slide the latch body out. Before it comes out completely, check which way the angled latch face points. Installing the new latch backward is a simple mistake that can make the door refuse to close properly.
Insert the new latch
Slide the new latch into the door edge with the angled face toward the strike plate. The faceplate should sit flush. If it stands proud because the plate shape is slightly different, trim the recess carefully rather than tightening the screws until the plate bends.
Fit the exterior and interior handles
Fit the exterior side first, then line up the interior side. Start the screws by hand so the threads catch cleanly. If the trim does not sit flat, stop and check that the latch is fully seated and the spindle has passed through the latch hub correctly.
Tighten the screws evenly
Tighten the screws a little at a time, alternating between them. Test the handle after a few turns. If the handle suddenly feels stiff, loosen the screws slightly; the lock may be under pressure rather than defective.
Install or adjust the strike plate
Close the door slowly and watch where the latch meets the frame. If it rubs high, low, or too far forward, adjust the strike plate with small changes rather than cutting a large new recess immediately. A lock that works perfectly with the door open but sticks when closed usually has a strike plate or door-alignment issue.
Which locks may need professional replacement?
Some lock jobs are worth handing to a locksmith or experienced installer, especially when the door is expensive, old, misaligned, or part of a shared or rental property. A simple bedroom lever is low risk; a front door with a high-security lock or multipoint mechanism is a different situation.
Mortice locks need precise fitting
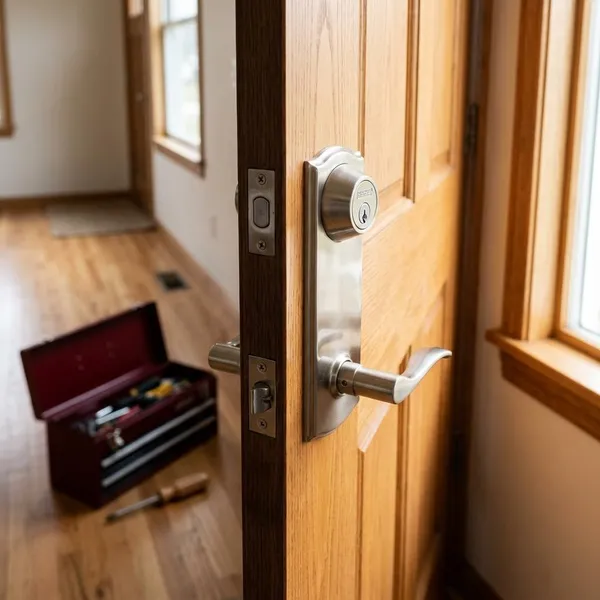
A mortice lock has to fit the existing pocket in the timber door. If the replacement case is too large, the door needs careful cutting; if it is too small, old openings may remain visible. Professional fitting makes sense for older front doors, stained timber, or any door where a messy cut would be hard to hide.
Multipoint locks need compatible mechanisms
Full multipoint mechanisms need close compatibility with the existing frame keeps. The center gearbox, strip length, and locking points all matter. Replacing just the cylinder may be a DIY job, but replacing the full strip is often better left to someone who can identify and source the correct mechanism.
Damaged doors may need repair
If the door is split, the screw holes are stripped, the hinges have sagged, or the frame has shifted, a new lock may still feel loose or sticky. In that case, repair the door or frame first. Otherwise, the new hardware is being asked to solve a structural problem.
High-security locks may need specialist tools
High-security cylinders, reinforced plates, and upgraded deadbolts only help if they are fitted correctly. If the goal is a serious security improvement rather than a simple like-for-like replacement, professional installation can be the better value.
Rental locks may require owner approval
For a rental home, check the tenancy agreement or ask the landlord or property manager before changing locks. Some properties use master keys, shared access rules, or emergency access requirements. Written approval is safer than assuming a lock change is allowed.
Conclusion
A standard lock replacement is usually a fair DIY job when the lock type and measurements match, but the safest first move is always to identify what is already on the door before buying parts. If the lock is complex, the door is damaged, or the property has access rules, stepping back and getting approval or professional help is usually cheaper than fixing a forced installation later.